Tuesday, February 12, 2013

This is a more complicated one but don't throw it out after first glance!  Try it!  You will get a lot of comments on it.  :)
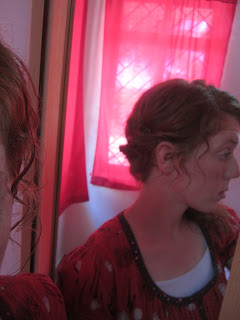
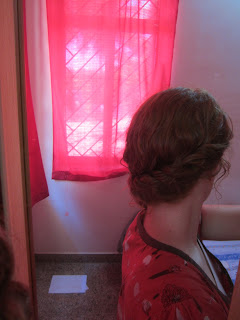
Ok, this is just two normal french braids.  First part your hair in your normal part.  Mine is always over to the side.  So I started on the side with the deepest part and start my french braid.  French braid around til a little behind your ear then stop adding hair and just finish the braid down.
Now go to the other side and french braid around the other side of your head til all the hair is in a braid and finish the braid.
Next take the two ends and make a fun design with them and bobby pin them!  :)
As you can see below I did 2 swirls.
Hope you enjoy!  Leave a comment if you have any questions!


Friday, February 1, 2013

Ok this one I got and get comments on ALL the time when I do it and get asked the same questions here as I did over in India, "Did you do that yourself?  I love that!  Did it take you a long time?"
These pictures don't show it very well but yes you can do it yourself and no it doesn't take long!  Yay!
Now, for those of you with naturally curly hair you may be like me and need to do these braided do's while your hair is still damp.  I have to or else my hair will frizz all over the place!  But for those of you with striaght hair do it dry because it looks better that way.
(I got this hair do idea off Pinterest so I'll post the pic. at the bottom.  It'll show it better than mine.)
 
Ok, first take your bangs and/or the front section of your hair.... part off a square.  Twist it 2-3 times, bump it up a little and bobby it.
 
 
Then, starting on the opposite side, take a small section starting in front, divide into 2 pieces, and do a French Twist (how to video in the 'How to Braids" page above) all the way around to the other side of your head just behind your ear and twist all the way down.  Don't let go or it will untwist!  Now take the end and twist it back, making a spiral and bobby pin it!

 
Sorry it's not very big!  :{


Thursday, January 31, 2013

Here is a 'Curly Do'!  :D 
But you can do this on straight hair as well.  All I did was do a French Twist... (how to video below) and loosely twisted all the way back adding hair as I went.  Make sure on this one you don't pull too tight you want that soft look.  I left some curls out up front by my face to soften the look as well.
Then when I go to the other side I secured it and let it hang down into a side pony!
 
*(I added a new page on how to do different braids.  Hope you'll check it out!)


Tuesday, January 29, 2013

One this one I started at the top and Dutch braided down one side.  Then I pulled the rest of the hair over, twist into a bun, and pin the braid around the edges!
 

Saturday, January 26, 2013

Sorry I couldn't upload any pictures last week! 
Anyway, these two were really easy and great for keeping your hair off your neck.  I just French Braided or Dutch Braided diagnolly and ended it in a bun.


Friday, January 11, 2013

Ok so for these next 2 hairstyles you need to know how to do a French Braid and a Dutch Braid.  And instead of trying to teach you how through pictures and words this lady does an awesome job of teaching hairstyles.  So if you don't know how to do either one watch these then scroll down to see what I did with them.


Wednesday, January 2, 2013

Back...

Hi girls!  I'm back from an AMAZING 5 months in India!  and I have some new do's to share!  Most of them are not 'curly' and will be more what you would think of as 'summer do's' cause most of them are updo's that I wore in India where a normal day is upper 90's low 100's!  I took pics. while I was there so the finished product is from there and taking step by step ones here.  :)
Hope you all enjoy!  :)
 
 
This one is a really simple one and so quick to do....
I am big on off-to-the-side do's right now so most of the ones I did in India were that.
For this one I just sectioned off a portion of hair in front and braided it back.  Then pulled the rest of my hair over to the side and twisted it up into a bun and bobby pinned it.  Then wrapped the small braid around the bun and bobbied it!  :)


Friday, August 3, 2012

Sorry!

Hey girls!  So sorry about the Giveaway!  I am actually in India til Dec. and I was hoping to fit the Giveaway in before I left but I put too many things in before I left so sorry!  And it looks like I probably won't be posting til I get back in Dec.  But... if you want to keep up with my doings in India you can visit my other blog...  www.jordans--corner.blogspot.com .
Sorry!

Wednesday, June 13, 2012

Giveaway!!!

Giveaway coming soon!!!!
I am heading down to the Bahamas this week for a missions trip...(yes it is a real missions trip)... but when I get back I am going to host a Giveaway!  I hope all of you will participate!
Junk the Monk will be providing two sweet prizes (pictures to come) so I hope you will check back later to see how to win!


I also had a hair party at my house Sunday and had a lady over from our church, that went to hair school, and she showed this ADORABLE curly do that I can't wait to share with you!  And it is sooooo fast!  I'm hoping to post it before I leave so be sure to check back later!  :)

Wednesday, May 23, 2012

Wet Hair Styles

Hey girls! Here are some neat hair do's you can do when your hair is wet and you don't have time to dry it and style it.  Hope you enjoy! 
She talks in the beginning but after that you can just mute it and read the instructions.


Friday, May 11, 2012

I am soooooo excited to show you all this do!  I have seen it on Pinterest and have wanted to learn how to do this one and finally last week I figured it out!  I think this do is soooooo cute to do with curly hair.
My little brother kept saying I looked like a Greek so in his honor I will call this the....

Grecian Updo


My hair is about shoulder length so if you have longer hair you may have to find out a different way to put your hair up in the back.  But what I did was loosely gather my hair at the nape of my neck and folded it up.  Giving it a twist or two, and bobby pinning it in place.  I like leaving a few curls hanging down in front but that is up to you and what style you like.


Then I took a really long ribbon and secured one end under my neck and secured it with a bobby.  Then wrapped it around my head twice and secured the other end with another bobby that crossed the first one for security.


And that's it!  You could also use a scarf for a different look!
Well, hope this works for you!  Let me know what you think!  :)


Saturday, April 14, 2012

Wednesday, April 4, 2012

Here I thought only girls with straight hair could do the Waterfall Braid!  Now I'll have try it on mine!

(If you don't know how to do the waterfall braid here is a great video on how to do it on yourself, or someone else.  http://www.youtube.com/watch?v=Y90s6neUKEY  ----  http://www.youtube.com/watch?v=VkUo6JQud_o&feature=relmfu )